Modifying music into a video can be enjoyable, as music and video together can have a far more effective effect than either one alone. Nevertheless, it might appear more discouraging than enjoyable if you do not understand how to modify music or line it up in your video.
There are some methods you can utilize to make modifying music into videos a lot easier. Obviously, the method you make use of these pointers can alter depending upon which modifying program you utilize, however the basic concepts ought to use.

Edit On the Beat
One effective method to modify music into a video is to modify the video cuts in time with the beat. Or, line up particular clips. Doing this is extremely simple no matter which video modifying program you're utilizing. Here's how.
- Enter into the timeline of your video and discover your audio track.

- Take a look at the waveform of your audio and see if you can expand it in your program.

- Discover the peaks in the audio. This is where the beats are.
- Modify your video in time with these peaks, and you'll discover that the music will compare to them.
If you modify in Adobe Best, there's an even much better method to do this approach.
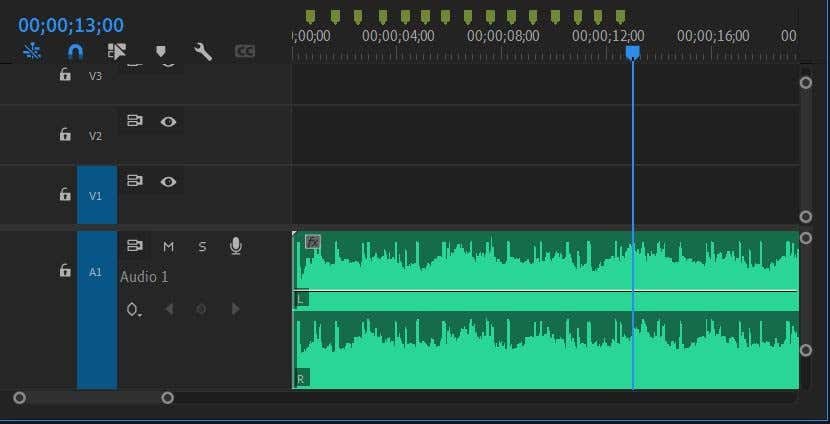
- Include your audio to your timeline.
- Play through the audio and press the M secret at the points where you wish to include your markers. These will be the points where your video footage cuts to the beat.
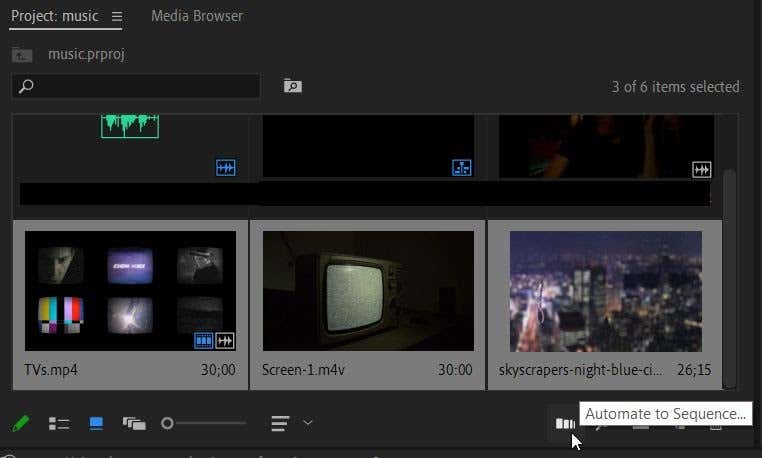
- Select all your video footage from the Job panel, then right-click and click Automate to Series in the bottom ideal corner of the panel.
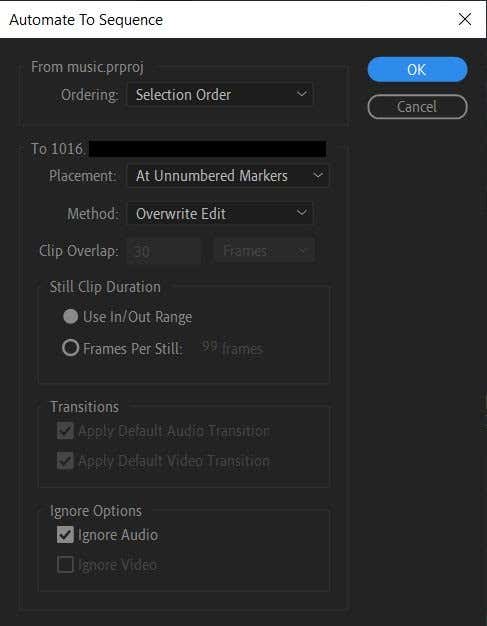
- Set the Purchasing settings to Choice Order and Positioning to At Unnumbered Markers, then choose OKAY If your clips have actually audio connected, make certain you set the Technique to Overwrite Edit and mark off Neglect Audio
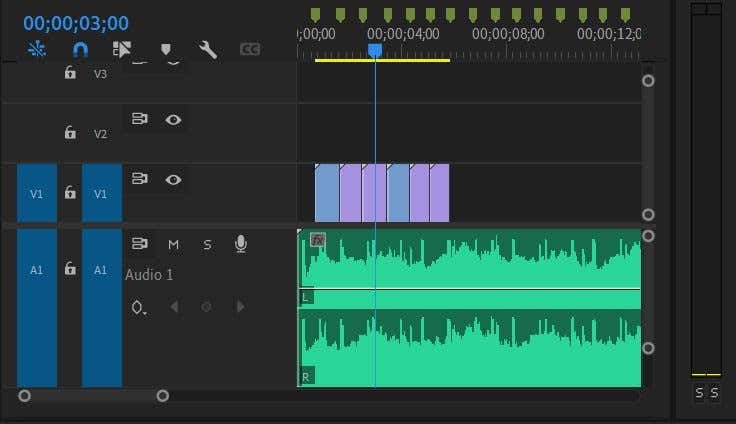
- The software application will then cut the video footage according to the markers you set.
Modification the Speed of Clips
Another method you can include an appealing impact, particularly if you discover a clip is longer or much shorter than required, is to alter the speed. By doing this, you can more quickly get parts of clips you desire in the video and make it much easier to modify to the music.
The procedure might be a little various depending upon what video modifying program you're utilizing, however here's how to do it in Adobe Best.
- Right-click on the clip you wish to alter the speed of.
- Select Speed/Duration
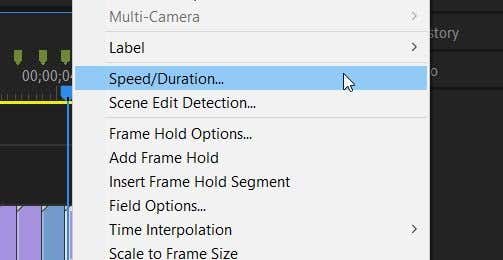
- In the window that appears, altering the portion of the Speed worth will figure out how quick or slow the clip runs.

You can likewise utilize the Time Remapping function to alter the speed of your clips and have more control of the points in your clips you wish to be accelerated or decreased.
- Select the clip you wish to alter the speed of in the timeline.
- Go to the Impacts Controls panel, and discover the Time Remapping dropdown.
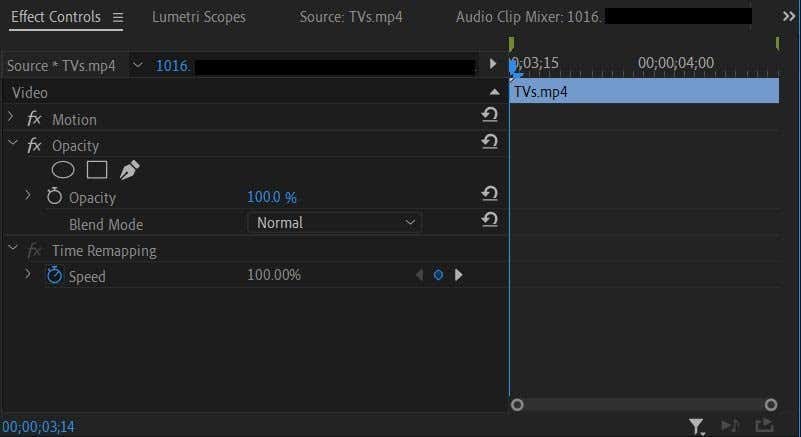
- Under this dropdown will be the Speed worth. You can set keyframes and alter this worth anywhere you desire the speed modification to happen.
Utilizing this approach, you can set speed modifications just throughout particular parts of a clip, or both accelerate and decrease video footage within the very same clip. It enables far more innovative control if you want to invest the time dealing with keyframes
Usage Shifts
Often, easy dives from one clip to the next might not match the feel of the music. It can work when the music is at a more hectic point, however you may desire a slower shift to match if the music is decreasing.
You can attain this by utilizing the shift video impacts within a modifying program. An excellent one to utilize in many circumstances is a fade-in or fade-out.
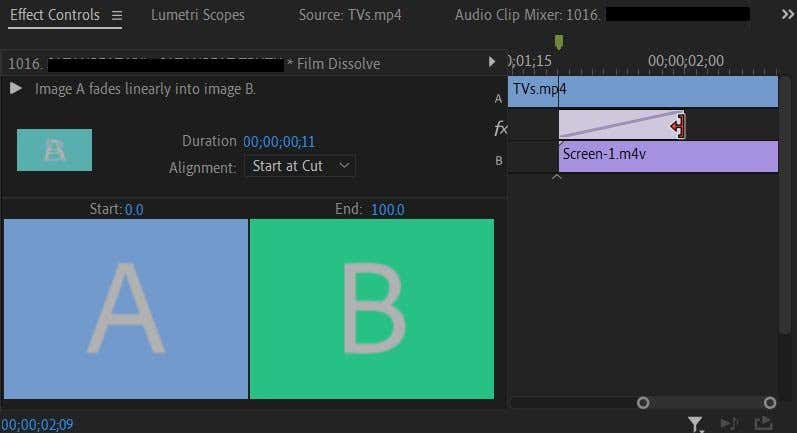
- Select the clip you wish to fade into or out of.
- In the Impacts panel, go to Video Transitions > > Dissolve
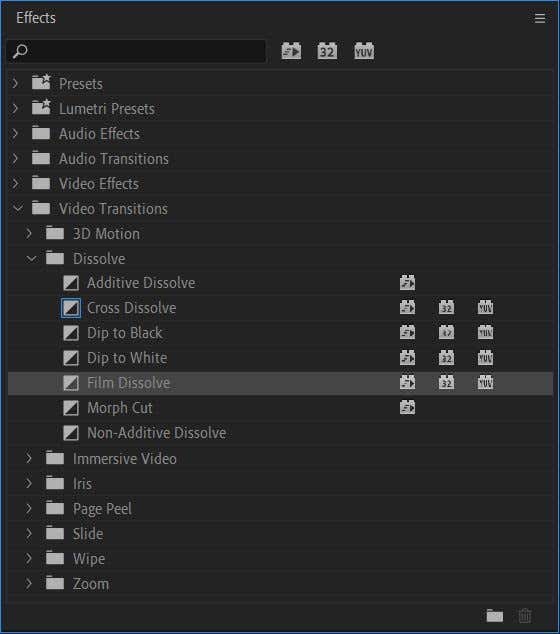
- There are several liquify impacts to pick from, however an excellent one is the Movie Dissolve for many usages. When you have actually chosen which one you wish to utilize, click and drag it onto the clip in the timeline. You can put it on either the start or end of the clip.
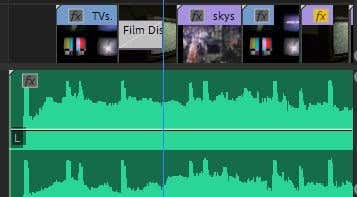
- Play your video back to see if you like how the shift looks. If you desire, you can make the shift longer or much shorter by choosing it and going to the Impacts Controls panel. In the timeline beside the controls, you ought to have the ability to pick the shift impact and drag it out or in to make it longer or much shorter, respectively.
Explore the other shift impacts to see if they work much better with your task. For instance, you can utilize the Cross Dissolve impact to go out of one clip and fade into the next.
Modifying Lip-Syncing
Among the more discouraging parts of modifying music to video comes when you have lip-syncing parts Making certain the lyrics in the audio line up with the individual's lips takes a great deal of experimentation, however there are some methods you can make the procedure a lot easier.
- Drag the clip into the timeline with your subject singing their lines.
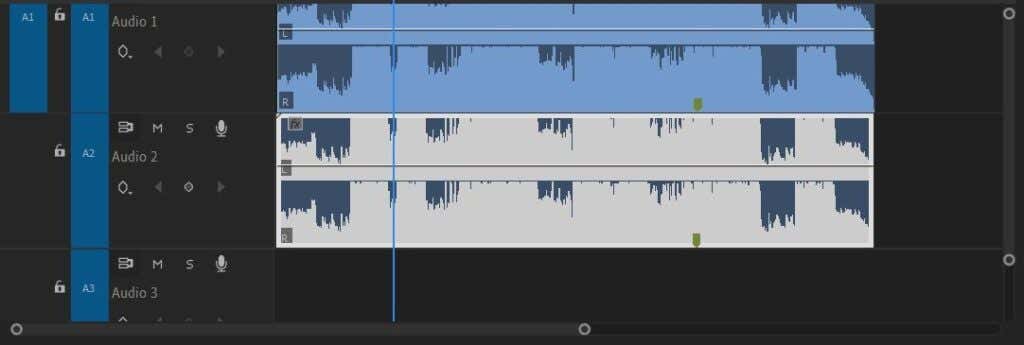
- Utilizing the handlebars on the sides of the audio timeline, drag it inwards to make the audio from the clip bigger so you can see the waveforms.
- Drag the music audio into the timeline, putting it into an audio track straight listed below the clip's audio.
- Taking a look at the waveforms of both audio tracks, attempt to match the peaks and dips by moving the music audio up until they are lined up.
- Silence the audio track from the initial clip by clicking the M icon on the left side of the timeline panel. Then play the clip to see if the topic's lip motions line up with the music audio.

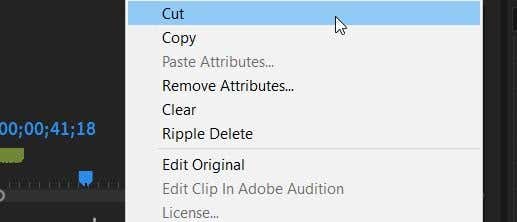
- When you feel they compare well, you can erase the audio from the clip by right-clicking it and picking Cut
Modifying Music Into a Video
Modifying a video can be a great deal of work, particularly if you're brand-new to these methods. Nevertheless, these pointers above ought to assist you a lot in developing a fantastic video.