Normally, your network router designates a vibrant IP address to your gadgets, including your Windows 10 and 11 PCs. If you require a fixed IP address for your PC, you either require to configure your router or alter a settings choice on your computer system.
The advantage exists are several methods to designate a fixed IP address to your Windows PC. Depending upon what you feel comfy with, you can pick an approach and continue with it to get a repaired IP address for your device.
Why Utilize a Fixed IP Address?
There are lots of factors you require a fixed IP address. It's possible you utilize a remote connection to link to your PC. In this case, having a long-term IP address makes developing the remote connection much easier.
Likewise, if you utilize your PC for network file sharing, a fixed IP address makes sure the other gadgets on your network can link to your PC with no reconfigurations.
Appoint a Fixed IP to Your Windows 11/10 PC Utilizing Your Router
One method to get a fixed IP for your PC is by configuring your router to designate a defined IP address to your device. Many routers use this choice however how you set up the router is various for each router design.
Normally, you 'd follow the following actions to set up a fixed IP for your PC on your network router.
Discover Your Network Adapter's MAC Address
For your router to determine your PC and designate it a particular IP address, you require to enter your network adapter's (which remains in your PC) special MAC address on your router's settings page.
So, let's very first discover your network adapter's MAC address:
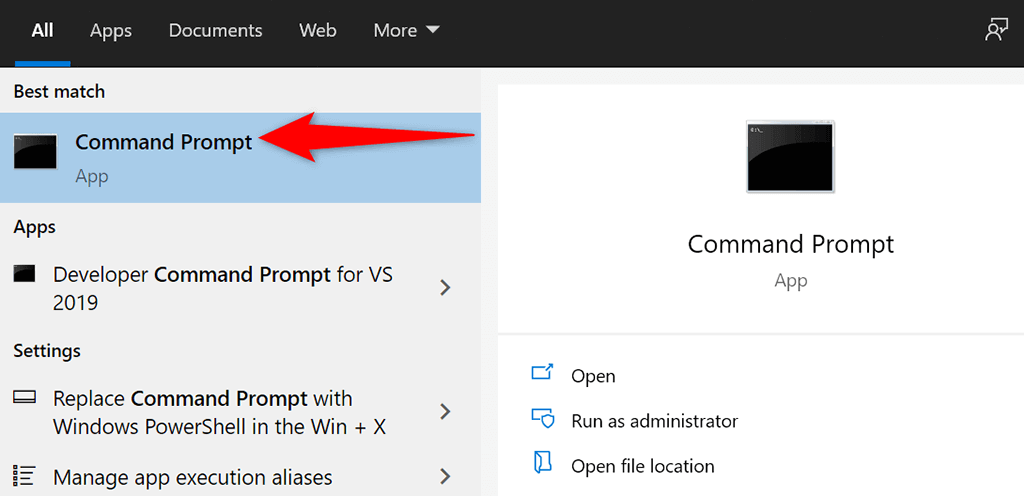
- Open the Start menu, look for Command Trigger, and choose Command Trigger in the search engine result.
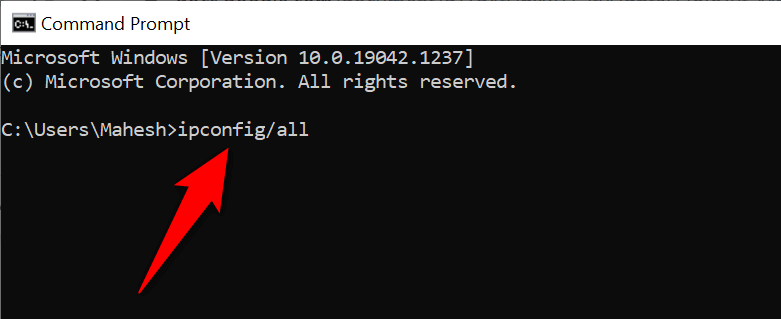
- Type the following command in the Command Trigger window and press Get In:
ipconfig/ all
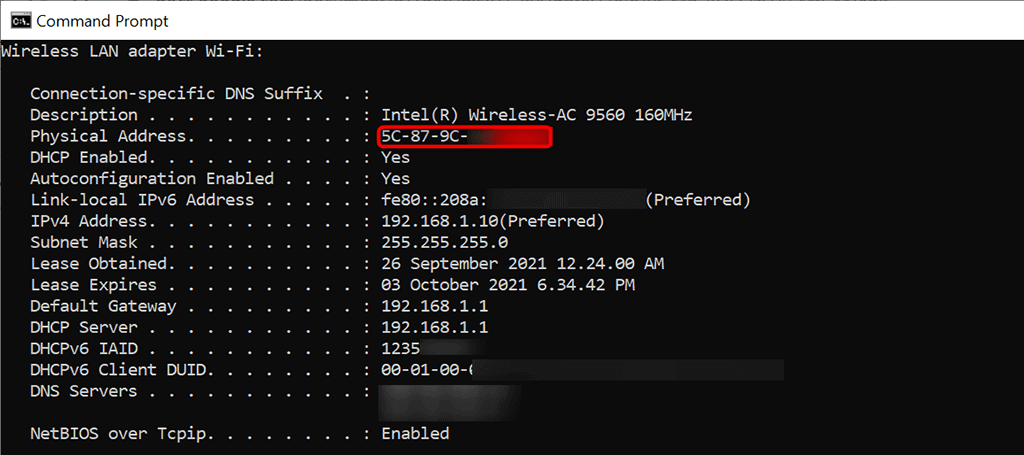
- Command Prompt will show numerous worths on your screen. Discover your network adapter here and search for the Physical Address field's worth. That's your adapter's special MAC address. Take down this address.
Configure Your Router to Appoint a Fixed IP to Your PC
You now require to gain access to your router's settings page. For the majority of routers, you can do this by going into the 192.168.1.1 IP address in a web internet browser on your computer system. If this does not work for you, consult your router's handbook to learn how to access the settings page.
- Introduce a web internet browser on your computer system, type the following IP address, and press Get In
192.168.1.1
- You'll see your router's login page. Enter your router's username and password and continue. For the majority of routers, you can utilize admin in both username and password fields.
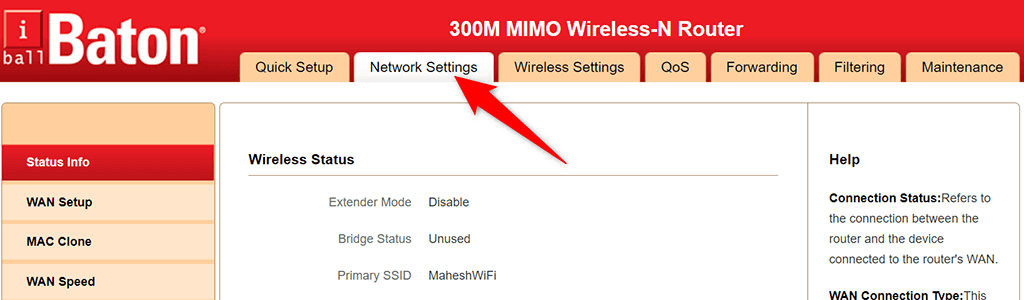
- Select Network Settings at the top of your router's settings page.
- Select DHCP Customer & & Address Appointment from the sidebar left wing.
- Go into the fixed IP address you want to designate to your PC in the IP Address field on the right.
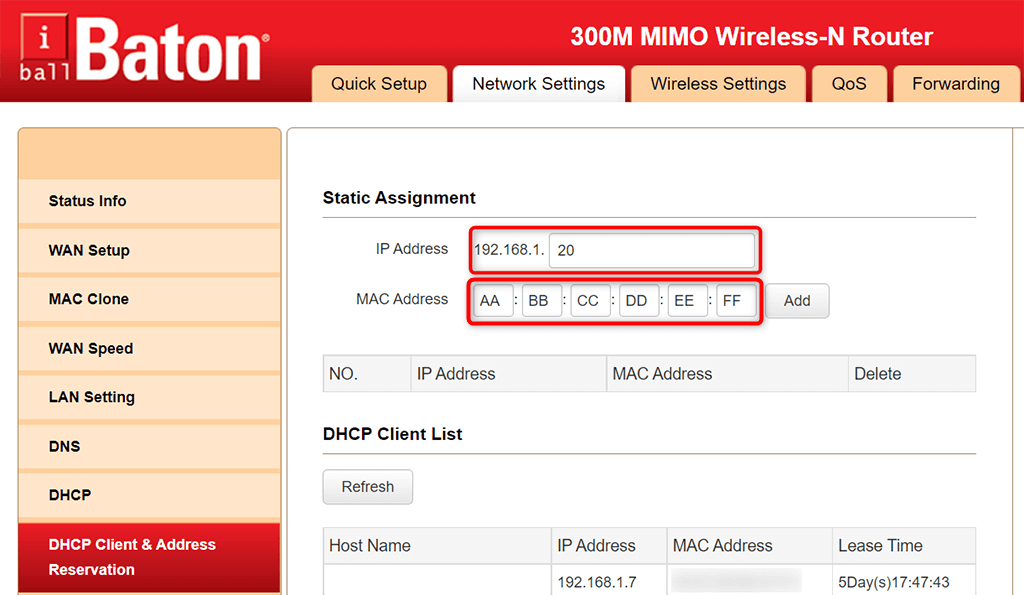
- Type your network adapter's special MAC address in the MAC Address field. Then, choose Include and after that choose OKAY at the bottom of the page.
- Reboot your router.
When your Windows 11 or 10 PC links to your router, your router will designate the defined IP address to your PC. This will take place each time you link your PC to your router.
Appoint a Fixed IP to Your Windows 10 PC
If you do not want to configure your router's settings, the other method to designate a fixed IP address to your Windows 10 PC is by utilizing the Windows Settings app. You can configure your IP settings in this app to guarantee your PC constantly gets a special fixed IP.
Nevertheless, there's a small concern with this approach. If your router has actually currently appointed the IP address that you desire for your PC to another gadget, you'll experience concerns linking your PC to your router
To navigate this, attempt to utilize an IP address far beyond the basic IP addresses that your router designates. For instance, if your router normally provides IP addresses as much as, state, 192.168.1.10, then utilize 192.168.1.20 as the fixed IP for your PC.
To continue with this approach:
- Open the Settings app on your PC by pushing Windows + I secrets at the exact same time.
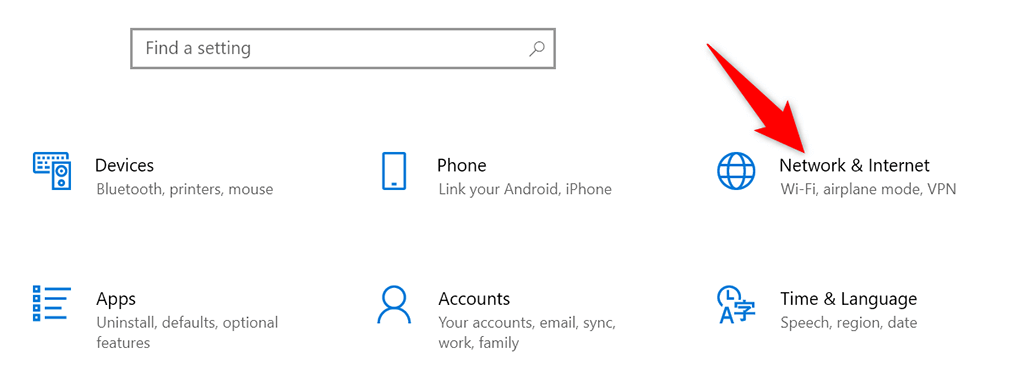
- Select Network & & Web(* )on the Settings window. Scroll down the
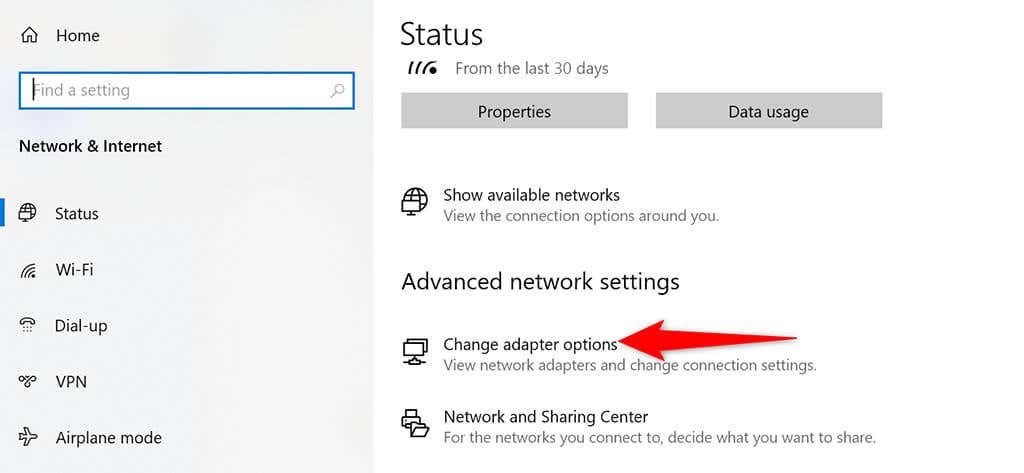
- Status page that opens and pick Modification adapter alternatives You'll see a list of your network adapters. Right-click the adapter that you utilize with your network and choose
- Characteristics from the menu. Select
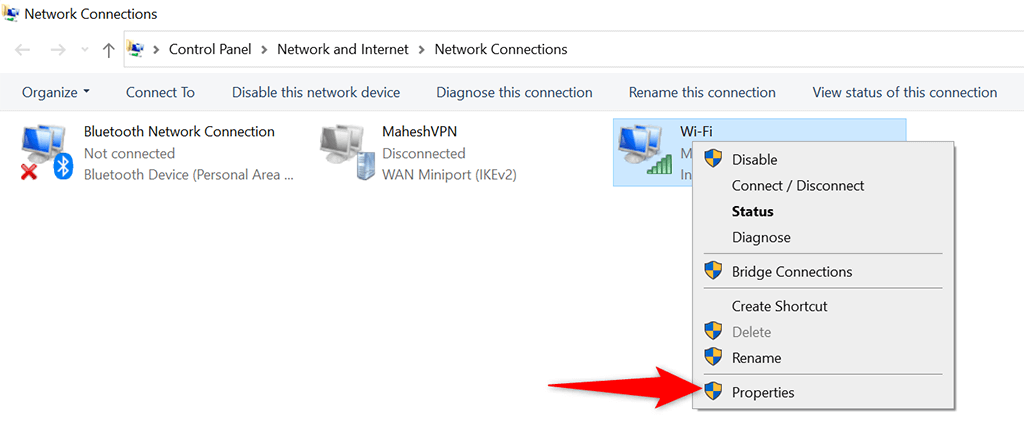
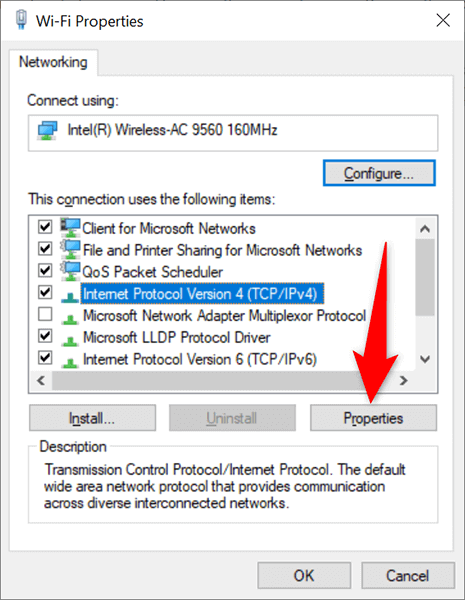
- Web Procedure Variation 4 (TCP/IPv4) in the list and choose Characteristics Make It Possible For the
- Utilize the following IP address choice on the following window. Select the
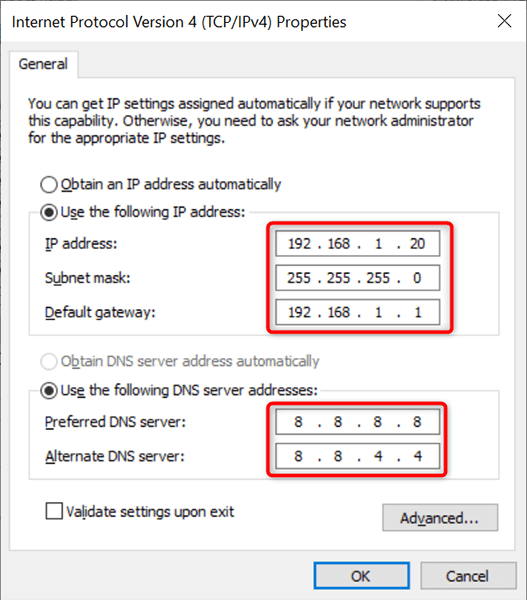
- IP address field and type the fixed IP address you want to designate to your PC. Fill Out the
- Subnet mask field, which is normally 255.255.255.0 Type your router's entrance, which is normally 192.168.1.1, in the Default entrance field. For DNS servers, you can utilize Google's Public DNS. To utilize these, pick the
- Preferred DNS server field and type 8.8.8.8 Select the Alternate DNS server field and type 8.8.4.4 Then, pick OKAY Close the
- Characteristics window by picking Close Your Windows 10 PC will detach from your router, and it will then instantly reconnect. After this reconnection, your PC ought to now have actually the defined fixed IP address assigned to it.
Appoint a Fixed IP to Your Windows 11 PC
Like with Windows 10, you can utilize the Windows Settings app to designate a fixed IP address to your Windows 11 PC.
Press
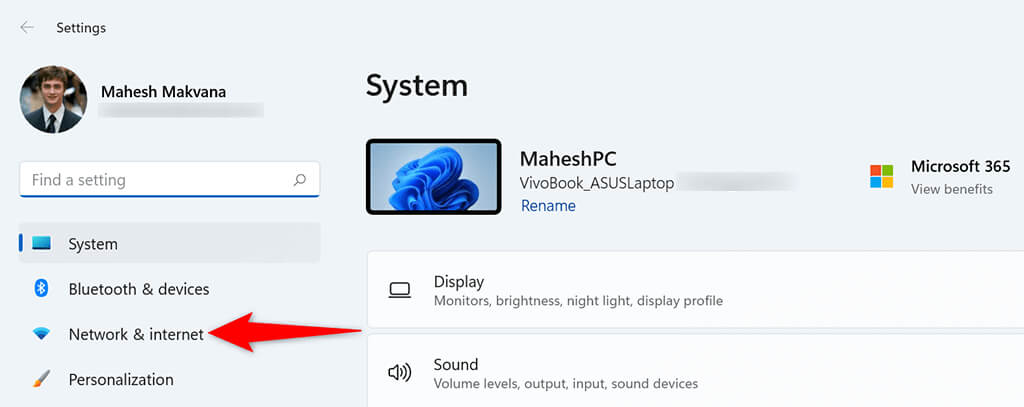
- Windows + I secrets all at once to open the Settings app. Select
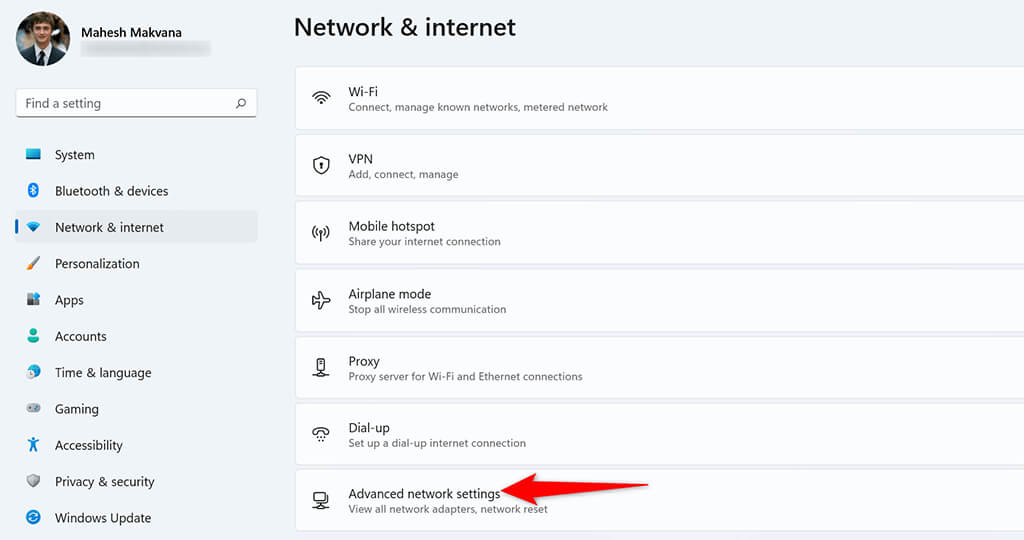
- Network & & web(* )from the sidebar on the left in Settings. Select Advanced network settings
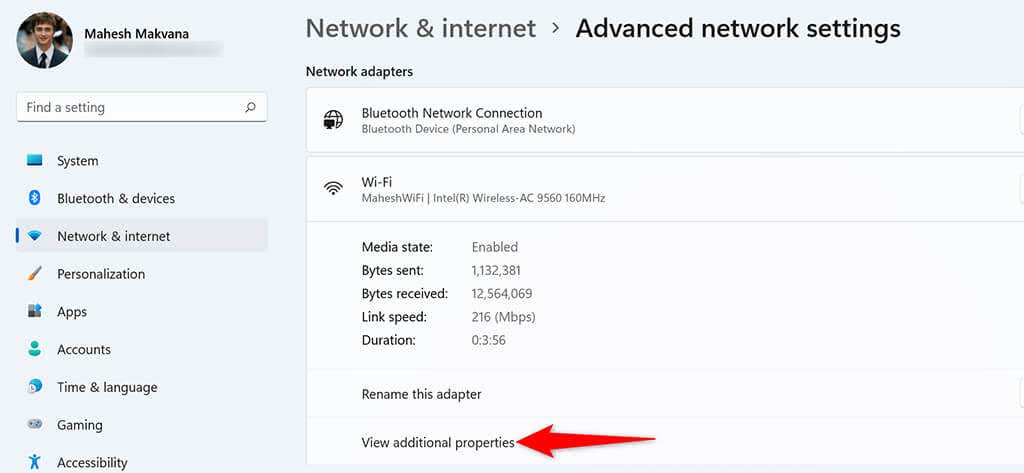
- at the bottom of the Network & & web page. Discover your network adapter in the list and pick the adapter. Then, choose View extra residential or commercial properties
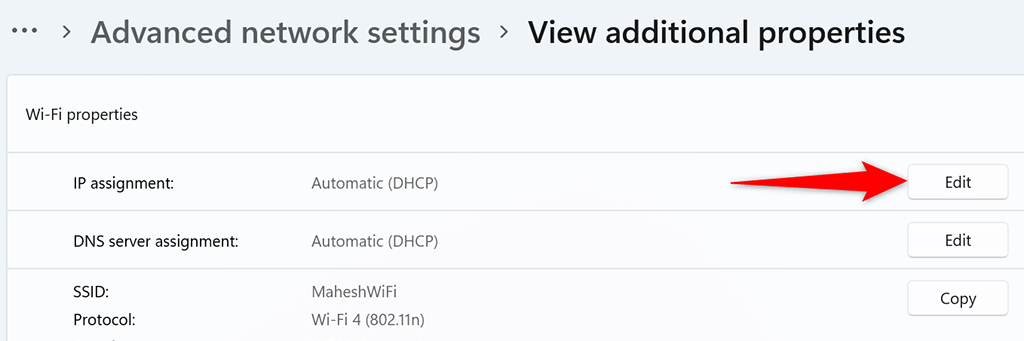
- Select Edit
- beside IP project Select Handbook
- from the Edit IP settings dropdown menu. Then, toggle on the IPv4 choice. Select the IP address

- field and type the fixed IP address to designate to your PC. Select the Subnet mask
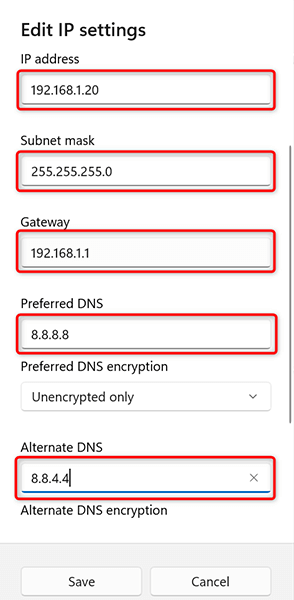
- field and go into 255.255.255.0 Enter your router's IP address, which is normally 192.168.1.1, in the Default entrance field. Get In 8.8.8.8
- in the Preferred DNS field. Get In 8.8.4.4 in the Alternate DNS field. Select Conserve
- at the bottom. And your Windows 11 PC now has a fixed IP address appointed to it. In the future, your PC will continue to get this fixed IP address from your router, supplied there are no IP dispute concerns with your router