
The XAMPP setup is an extremely simple job, however Windows 10 in some cases may not permit the Apache server to run. So let me discuss how to repair apache not beginning on XAMPP?
Generally, it's due to the fact that the World Wide Publishing Service is working on port 80 on your computer system, which likewise occurs to be the default TCP/IP port that Apaches utilizes on XAMPP, and 2 applications can't utilize a comparable networking port.
If you face this concern, there are a couple of methods to navigate it. you'll uninstall the publishing service, otherwise, you can alter the default port on Apache.
Uninstall Internet Solutions
Prior to uninstalling World Web Providers ensure, you do not have any app depending upon the Internet Solutions function.
you can uninstall it utilizing the following actions:
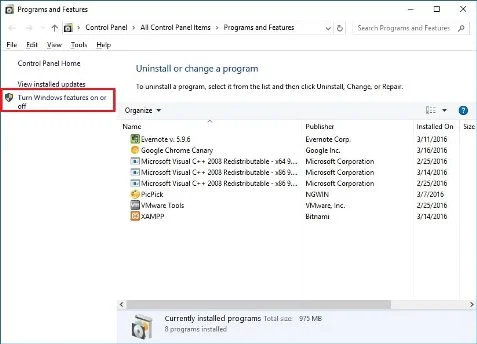
Step1: Type Control Board in the search bar and open it.
Step2: Click Programs = >> Programs and Functions.
Step3: After that, you can see a brand-new Window where the Left side Turns Windows functions on or off alternative click it.
Step4: You can see a brand-new window where an Web Info Solutions alternative with a plus indication(+).
Step5: Click + indication and you will see the Internet Solutions alternative with an examined checkbox so clear it and click the okay button.
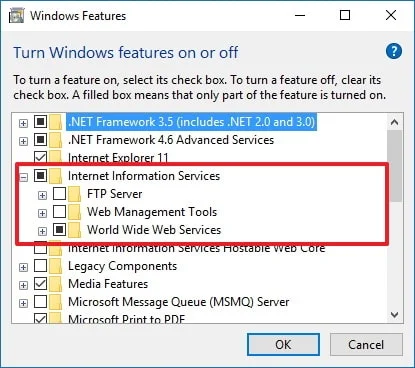
Step6: Reboot your computer system.
Step7: Start XAMPP Control Board.
Step8: Start Apache server by Clicking Start Button.
How to Modification default Apache TCP/IP port?
if you have an application that depends upon Internet Solutions and you can eliminate the WWWS service then you require to alter TCP/IP Port. So Apache will work on various Ports.
So follow the listed below actions to alter Apache port-
Step1: Open XAMPP Control Board click the Config button
Step2: Select the Apache (httpd.conf) alternative and Scroll down and discover the line: Listen 80
Step3: Modification the number 80 for another IP port number that isn't in usage. For example, you can attempt port 81 or any other. (After the modification the line need to check out: Listen 81)
Step4: Conserve and Close httpd.conf file.
Step5: Click the Start button on Apache from the XAMPP Control Board.
After finishing the actions, the Apache server need to run without problems on the brand-new port that you defined.
How to increase phpMyAdmin upload size on XAMPP?
Another typical issue with XAMPP is that the default database upload limitation. as an example, consistently designers will make a reproduction of a web website for fixing functions or work on-site without interfering with the live site. Nevertheless, individuals utilizing WordPress or another material management software application will rapidly identify that they can't publish a database due to the fact that it surpasses the optimum upload size allowed, which by default is 2MB.
To increase the database upload limitation on phpMyAdmin, utilize these actions:
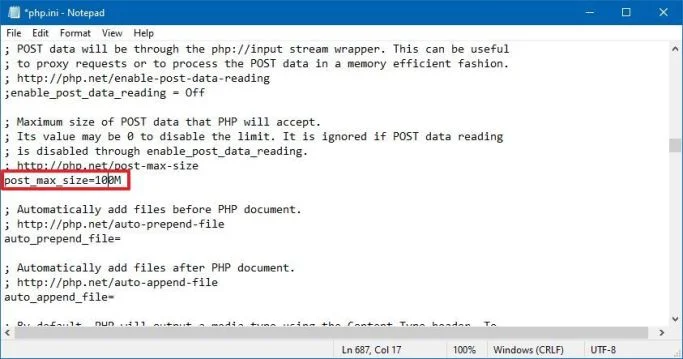
Step1: Open php.ini submit from the course C: xamppphp/php. ini
Step2: In this file search 2 variables upload_max_filesize and post_max_size And change old worths with the needed worths that you desire. for instance: post_max_size= 80M and upload_max_filesize= 80M to import database files of as much as 40MB.
Step3: Click the STOP button and after that, click the START button for MySQL and Apache.
After that you finish the actions, you need to now have the ability to import big database files on phpMyAdmin.
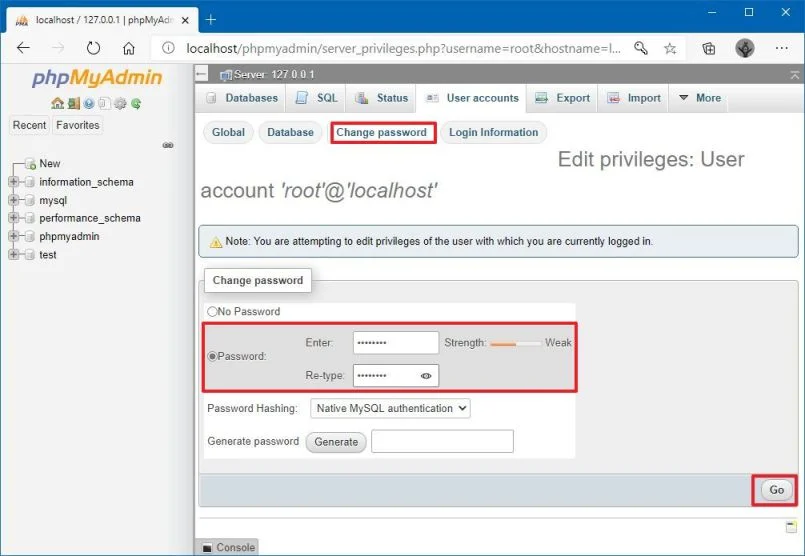
How to alter phpMyAdmin password on XAMPP
By default, MySQL phpMyAdmin utilizes "root" as username without password, which implies that if you're setting up a Joomla or WordPress website when asked you just require to get in root as the username and leave the password field empty.
To alter or produce the phpMyAdmin password on XAMPP, utilize the following actions:
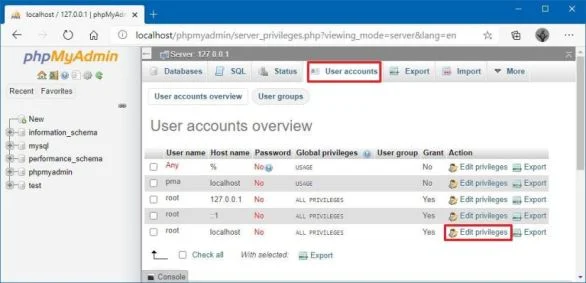
Step1: After Start XAMPP Control Board, Open phpMyAdmin by clicking the Admin button or straight with the course localhost/phpMyAdmin in the web browser.
Step2: Click the User accounts tab.
Step3: Click the Edit advantages link for the username root, where the hostname localhost
Step4: Click the tab Modification password that remains in the center.
Step5: Go Into Password and Confirm Password in the text fields and click Go Button.
How to repair phpMyAdmin gain access to rejected message
In Some Cases we have issues signing into phpMyAdmin, we'll require to set up the config.inc.php.
To alter the setup settings in the config.inc.php file, follow the following actions:
Step1: Open XAMPP Control Board.
Step2: Click Explorer Button, and phpMyAdmin folder.
Step3: In this folder, you can see config.inc.php file. Open with any full-screen editor.
Step4: Browse " Authentication type and details," and under this text upgrade the following lines:
- On
$ cfg['Servers'][$i]['auth_type']='config';changeconfigforcookie - On
$ cfg['Servers'][$i]['AllowNoPassword'] = real;changerealforincorrect
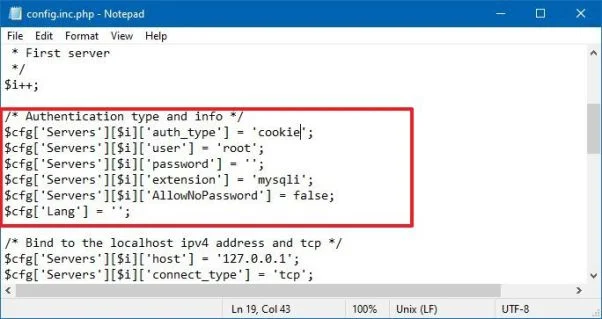
Step5: Conserve and Close the file.
After finishing the above actions you need to have the ability to access to phpMyAdmin control panel.