In this write-up, you will discover just how to Set Up Joomla Quickstart Bundle? So we have actually clarified all actions with screenshots. So you will certainly recognize quickly. This is an extremely easy stapes so I make sure you will quickly recognize all actions as well as there is much less opportunity to embeded installments while you are no experience in Cpanel or Joomla theme Setup.
What is the Joomla Quickstart bundle?
A Quickstart pack is primarily a completely practical demonstration web site as well as a Joomla bundle that consists of the CMS, parts, components, theme, as well as all various other essential information as well as personalizations. You do not need to by hand create or establish components, element information, or the CMS if you utilize Quickstart. In just a couple of clicks, the Quickstart Bundle permits you to mount a Joomla theme with demonstration information. By doing this of Joomla installment is very advised.
The very first step is to download and install as well as mount the quickstart bundle. After you've downloaded and install the quickstart bundle, adhere to these actions:
Exactly How to Submit the Quickstart Data to Your Web server?
You have 2 alternatives for submitting the quickstart data to your web server.
- cPanel
- FTP customer
- Mounting utilizing cPanel is the best service that a lot of us recognize with. Utilizing cPanel has the benefit of significantly minimizing the opportunity of folder as well as data authorization concerns while making web site adjustments.
- The 2nd technique is to utilize an FTP customer to submit the removed documents.
Submit upload utilizing cPanel
Allow See: Just how to mount Joomla theme on localhost?
We highly advise utilizing the cPanel upload alternative since it is much more reliable as well as conserves time. The fundamental actions as well as screenshots for submitting the data are offered listed below.
Action 1: The very first step is to download and install the quickstart data.
Action 2: Login right into cPanel

Action 3: Most Likely To the cPanel Data Supervisor as well as situate the folder where your web site will certainly be submitted. Select the Upload switch after opening up the folder.

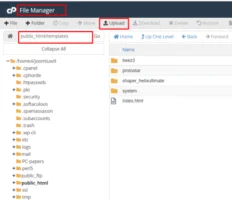
Action 4: Select the uploaded data as well as click the Remove alternative on top right after submitting the quickstart.ZIP data.

Submit upload utilizing FTP customer
Although this technique of uploading is much less preferred, you can still utilize it. The trouble in operation FTP Customer is authorization troubles, which could make it tough to accessibility pictures, thumbnails, or manuscripts.
Currently draw out the the.ZIP data to your computer system as well as submit the removed data to the area where you desire to mount it.

After you have actually effectively submitted the data, go below to discover just how to develop a data source. (public HTML)
Develop Data source on the web server
Making use of cPanel, producing a brand-new data source is very easy. You'll require a cPanel username as well as password prior to you start.
The complying with is an instance of just how to develop a data source:
Step1: To start, most likely to cPanel as well as login.
Step2: After Login right into cPanel, you will certainly see all areas of cPanel. So there you need to go in the DATA SOURCE Area as well as click MySQL ® Data Source Wizard.

Action 3: In the Following Action box, kind a brand-new data source name Ensure your name does not go beyond 56 personalities.

Action 4: Complete the spaces with a data source username as well as password You can additionally utilize Password Generator to develop a password. After that choose Develop Customer from the drop-down food selection.
KEEP IN MIND: Remember that you must utilize a solid password.

Tip 5: On top, an effective message will certainly be seen. Conserve every one of the details, consisting of the Username, Data Source Call, as well as Password, for later usage. To approve the customer all possible accessibility linked to your data source, click All Opportunities. Ultimately, click Following Action

Action 6: A effective message will certainly currently show up on top of the display. You can additionally develop a brand-new data source or customer from this display.
Currently,
Browse to your primary domain name (i.e. http://yourdomain.com) or any kind of suitable subdomain (i.e. http://new. yourdomain.com) where you have actually currently submitted the Joomla installment bundle utilizing your favored internet internet browser.
Joomla installment bundle
When you open up the website link, you'll see a box motivating you to finish the 4 activities listed below:
KEEP IN MIND: This coincides procedure as Joomla Setup
You'll see a box requesting you to execute the needed 4 actions after you open up the website link:
Action 1-- Every one of the arrangement alternatives, such as Website Call, Website Summary, e-mail, login, as well as password, will certainly be offered on the very first display.

Complete every one of the important details and after that click the Following switch.
Action 2-- Data source setups such as Data source Kind, Hostname, Data Source Username, Data Source Password, data source name, as well as table prefix are all consisted of in the 2nd action.

In the previous action, you constructed a data source, so get in every one of the data source information below.
Action 3-- As opposed to choosing None, choose the theme name. You will certainly not obtain the demonstration information on your Joomla website if you do pass by the theme name. Finally, click the Install switch.
The installment of your theme will certainly continue.

Action 4-- is the last action. In this action, just click the Eliminate Setup Folder alternative to get rid of the installment folder.
You can additionally mount the added languages from this area.
